Improving Print Quality
Poor print quality can present itself in many ways; as opens or shorts in traces, as a nozzle scratching the surface or not depositing ink at all. Once you gain intuition with the V-One it is very easy to identify a poor print and correct the problem.
There are two key parameters that dictate your trace quality: your ink pressure and your print height.
Ink Pressure
This is the amount of force the dispenser exerts on the ink during dispensing. Too much pressure will lead to shorts and potentially a broken nozzle or pierced piston. Not enough pressure will lead to open circuits.
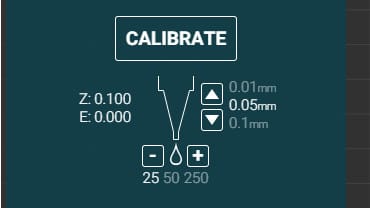
As part of the calibration step, a specific pattern is printed that consists of curved and parallel lines. If traces are too thick or too thin, the pressure buttons (- and +) will adjust the ink flow and control thickness.
You only need to click the pressure buttons once or twice before seeing a difference in trace thickness. If no ink comes out at all or far too much is coming out, then you should return to the priming step.
You can click the pressure buttons while printing to see flow changes in real time!.

Print Height
This is the air gap between the substrate and the tip of the nozzle. The default height is 0.08 mm (80 microns) for the silver ink and 0.14 mm for solder paste. Print height is maintained automatically during a print based on the height map generated through the probing step.
The following sections identify common printing issues you may experience.
Printing too high or ink pressure too low.
Symptoms
The ink does not adhere to the substrate. It balls up on the tip of the nozzle and gets periodically deposited on the substrate in clumps.
Solution
Ensure your height is set to 0.08 mm and increase the ink pressure. If this behavior persists then the nozzle might be clogged or the ink might be too cold. Wait until the ink reaches room temperature and try rotating the gear by hand to purge some ink and get good flow.
Printing high
Symptoms
A little bit subtle but if you look closely, the ink adheres to the substrate but the trace shape doesn't quite match the motion of the nozzle. The traces will also be very narrow and tall.
Solution
It's possible you have some dried ink on the limit switches that are throwing the calibration off. Make sure to clean the limit switches. You may want to force the printer to re-calibrate the height by pressing the home icon in the top right corner of the software.

Printing too low
This is dangerous territory and a broken nozzle is usually imminent. Please review our Broken Nozzles article
Symptoms
If you are printing too low the ink will be getting smooshed by the nozzle, and the traces will be as wide or wider than the nozzle. You will also start to see the substrate through the the traces.
Solution
Assuming a default print height of 0.08 mm, this indicates the height calibration is incorrect. Please review our Broken Nozzles article
Trapped Air Bubble.
Symptoms
A small gap is seen in a trace during printing, but the nozzle never raises or stops.
Solution
Sometimes a small amount of air is trapped in the nozzle when assembling the dispenser. This results in an air bubble being pushed through during dispensing, which will cause a gap in the trace, leaving an open circuit.
Carefully inspect the circuit after printing, and use the selective print function to re-print the trace with the gap. Select the features that contain the broken area in the print preview, and click START.
Tip: Use the Ctrl and Shift keys to tweak your selection!
Want more control when selecting features to print? Try the following!
Click and drag to select multiple features at once.
Holding the SHIFT key while selecting features will let you add to the current selection.
Holding the CTRL key when selecting features will subtract them from the current selection.

Last updated
Was this helpful?
