Aligning to a Prefabricated Board
Before printing a circuit with the V-One, you need to make sure that the circuit pattern will line up with the board. This is straightforward for bare boards, but what if you want to print on a board that already has circuit features on it? That's where Aligned Printing comes in!
Aligned printing allows the V-One to perfectly align and print a design on a substrate with pre-existing features. With aligned printing, your design options extend beyond just a single layer or a bare board.
Print double-sided PCBs by aligning with drilled vias
Create useful add-ons for your preferred hardware development platform by printing on Template Boards
Rework a PCB design by printing jumper wires and component pads - no need to spin a new prototype because you missed a decoupling capacitor!
Using Templates? Download our parts library (EAGLE) or dimensions drawings.
General Procedure
PCB Design
To be able to perform an aligned print, your PCB design must include both:
The features that you want to print
The existing features on the substrate that you are aligning to (for now, these must be vias or through-hole pads)
Note: Your final Gerber files must include the features (pads or vias) you wish to align to!
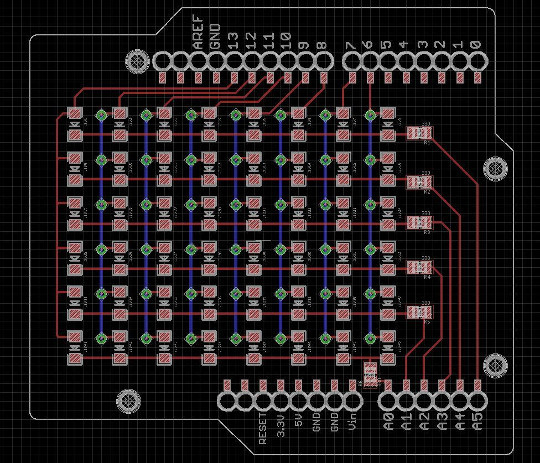
Take the design below, for example, of a double-sided LED matrix design for an Arduino Uno template.

In the design, there is no need to distinguish between existing features and alignment features. Instead, selective printing will be used to select only the features you want to print.
Select Aligned Printing
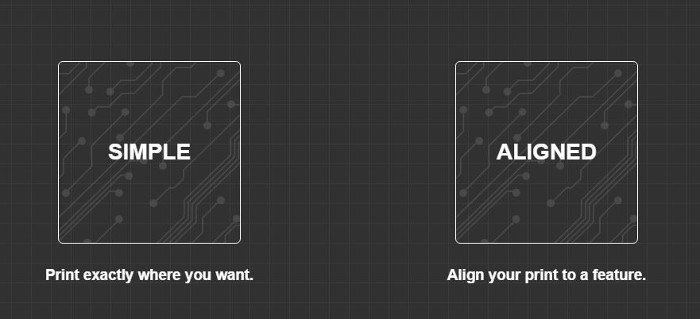
From the Start menu, select the PRINT flow. The V-One software will then prompt you to choose one of two options:

SIMPLE - Basic alignment for printing on bare substrates. This would be used for printing single layer circuits or (potentially) the top layer in a double-sided circuit.
ALIGNED - The method being discussed in this guide. Select this one!
Locate the Features
After loading the circuit and mounting the Probe, the V-One software will prompt you to Locate the highlighted feature. This procedure is very similar to the pad locate step when dispensing solder paste. Just like pad locate, you want to ensure that the probe is as centered as possible when confirming the feature location.
Selective Print
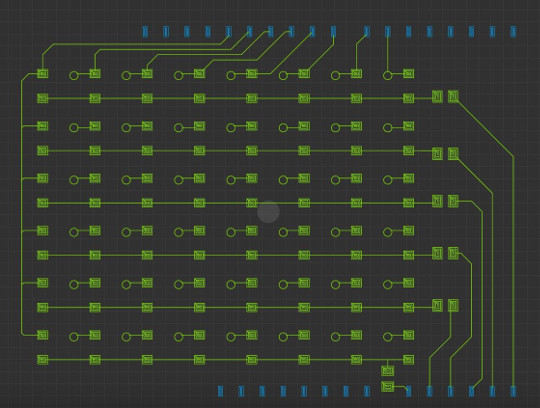
In the Print step, use Selective Printing to select only the features you want to print. This way, you can remove the alignment features and avoid printing redundancies.
Tips for selecting printing:
Click: Select a feature
Shift: Add to selection
Ctrl: Remove from selection
Click and drag: Select or deselect a group of features
Selected features will appear green, while de-selected features will be blue. In the design below, the template pads have been deselected - since they are already on the board, the V-One only needs to print the traces that connect to them.

From here, just click print and the V-One will print your aligned circuit!
Last updated
Was this helpful?