

4. Dispensing Solder Paste
Before starting, ensure you have completed the previous section 3. Getting Started with your First Print


Align the circuit
To dispense solder paste over top of our printed pads the V-One needs to know the orientation of the board. To do this, we need to help the V-One locate the designated pads:
Click the MOVE TO FEATURE button to start the pad location process.

Use the arrow keys to move the printer to the approximate location of the pad that is highlighted in the print preview. You do not need to align it perfectly just yet.
Click LOWER to drop the probe to the surface of the board.
Use the arrow keys to once again adjust the position of the probe. This time, position the probe in the center of the highlighted pad.
Click MEASURE to confirm the pad location.
Repeat steps 1-5 for the second highlighted pad.

Take your time! If the alignment is off, the solder paste will not print in the right spot.
After locating the pads, the V-One now knows where the board is located.
Validate the pad positions
Before we get to printing the solder paste, use this step to make sure that the pad alignment is accurate.
Click on any pads in the print preview, and the printer will go to the center of the pad. If you notice that the position is off, press the BACK button and repeat the Locate Pad steps.

Print
Load and prime the dispenser
Now we need to load our solder paste into the dispenser and prime it.
Load the solder paste cartridge and assemble the dispenser.
Slowly turn the gear counter-clockwise until you feel resistance (this is the dispensing plunger hitting the ink). Keep turning until you push a tiny amount of ink out of the nozzle.
Rotate the gear ¼ turn clockwise to stop the flow of ink.
Wait until the ink stops leaking from the nozzle and gently wipe the nozzle clean.
Mount the dispenser on the carriage.

Calibrate first
Unlike when we printed our Hello World circuit with conductive ink we do not have a built in calibration step for solder paste. To calibrate the solder paste we will selectively print on two of our pads until we are happy with the results.
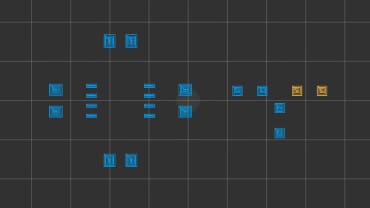
Select two of the pads to print solder paste on - we recommend using the orange pads selected above.
Click START to begin printing. Adjust the solder paste flow using + and - until the pads are completely covered, but not overflowing.
If there is too much paste, wipe the solder off of the selected pads and decrease the flow.
Hint: Keep repeating these steps until you are happy with the amount of solder paste being deposited.
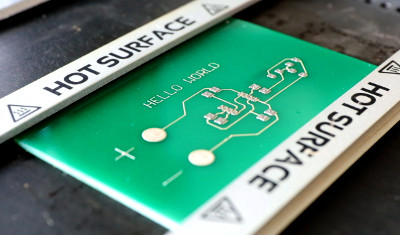
This completes the solder paste dispensing feature. Let’s move along to the next article and discover the V-One’s reflow capabilities!
Last updated
Was this helpful?