Purging Solder Paste
When to purge?
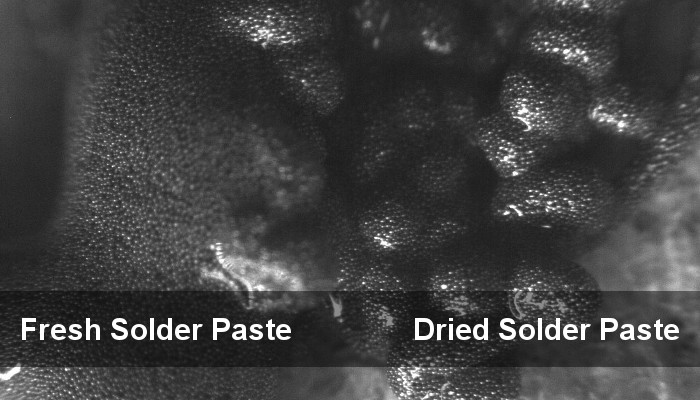
If you take a look at solder paste under the microscope, you'll notice the paste consists of tiny metal spheres suspended in a yellowish fluid. This yellow fluid is flux. Over time, the flux in the tip of the nozzle will start to evaporate, leaving behind dried out solder paste.
As shown below, dried out solder paste tends to clump together - and as you can imagine, it becomes very challenging to get smooth printing with the V-One.

If you are dispensing solder paste and you find that the solder paste is not sticking to the pads even after clicking the + button several times then the solder paste in the nozzle must be purged.
Tip: Try to purge your nozzle first before concluding it is clogged!
Purging the nozzle
To purge:
Grab a tissue or paper towel for the purged paste and position it under the nozzle.
Manually turn the gear on the solder paste dispenser counter-clockwise to initiate flow, like when you primed the dispenser. If you get some flow, proceed to step 5 - otherwise, your nozzle may be clogged.
Turn the gear until you get a steady flow of paste from the nozzle. Your goal is to purge the dried paste, so you want a healthy flow rate.
Allow the paste to purge for 30 seconds. If the flow slows down, turn the gear again to maintain a steady flow. You might observe a small color change as the paste goes from light gray to a darker gray.
Turn the gear clockwise to stop the flow.
Mount the paste dispenser back on the printer, and try again. Repeat steps 1-6 until paste is dispensing properly.
Solder paste drying out can be mitigated by storing the dispenser with the cap on, tip-downwards.
Last updated
Was this helpful?