7. Reflow and Assembly
Punk Console: Assembly
Soldering Time!
Now that you have installed rivets and deposited solder paste on your circuit, all that is left to do is place your components, reflow solder the board and hand solder the through hole components. The circuit requires the following components that have been included with the Punk Console kit:
2 - 0.01uF Capacitor
5 - 1K Resistors
1 - Green LED
2 - 500K Trimpots
1 - 556 Timer
1 - Piezo Speaker.
1 - 9V Battery
1 - 9V Battery Connector
Surface Mount Components
Carefully place your components onto the corresponding pads, as shown in the board layout below. The surface mount components you will place first are:
2 - 0.01uF Capacitor
5 - 1K Resistors
1 - Green LED
1 - 556 Timer
Hint: Use the tweezers included with the V-One to place components precisely.
Do not smear the solder paste when placing components. Once they are placed, press down gently so the components rest evenly on the pads.
Both the LED and 556 timer have a polarity. Remember to double check they are placed in the correct orientation before you solder them to the board. When in doubt reference the circuit schematic shown above.
During assembly, remember the LED has a polarity! The black coating on the connection indicates the cathode side (GND) and should be facing the left side of the PCB, as shown in the image below.

The 556 Timer also has a polarity, it should be installed with the white band facing the upper side of the PCB.
Once all of the SMD components are placed the board should look like this:

Reflow
Now that all of the surface mount components are placed the circuit is ready to be reflow soldered.
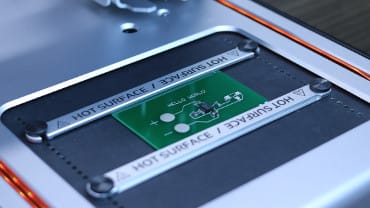
From the start menu, select the HEAT option.
Click the REFLOW tile.
Select the solder paste you're using, based on the lot name printed on the cartridge label.
Click REFLOW to start the process.

The V-One gets hot while reflowing. Do not touch! Do not leave unattended while heating!
When the heating cycle finishes, the V-One will start glowing blue. This means the soldered PCB is safe to remove.
Through Hole Components
Next up we need to hand solder all of the through hole components to the board. Here is a list of the through hole components included in the Punk Console kit:
The 2 trimpots
The piezo buzzer
The 9V connector.
To hand solder the through hole components first feed the component leads through the larger rivets. Soldering to the large rivets ensures a very strong mechanical connection. We can then use a soldering iron and the low temperature solder wire included with the V-One to solder each component to the board.
When you are soldering the battery connector, the red lead must be connected positive (+) pad as shown below.

The Result
Plug in the 9V battery and watch your circuit come alive. If everything is working the LED will be lit and the buzzer will be producing a high pitched tone.
Feel free to play with the trimpots, as you twist them the buzzer will produce different sounds. Can you play a song with them?
That concludes the tutorial - if you ran into any hiccups along the way, let us know at [email protected]. When you are ready, learn how to design with rivets here!
Last updated
Was this helpful?