> For the complete documentation index, see [llms.txt](https://docs.voltera.io/docs/llms.txt). Markdown versions of documentation pages are available by appending `.md` to page URLs; this page is available as [Markdown](https://docs.voltera.io/docs/v-one/learn-v-one/v-one-projects/punk-console-project/5.-adding-rivets.md).
# 5. Adding Rivets
### Punk Console: Rivetes
Now that both layers are printed, it's time to add rivets to the circuit to connect the front and back of the board!
The V-One Drill shipped with two rivet sizes, the smaller rivets are better suited for vias, while the larger rivets are suited for plated through holes.
To insert rivets, you will need:
* A set of tweezers
* A hammer or mallet
To secure the rivets you need to use the specialized rivet tools. Two were included with your drill bundle, one for each rivet size. Take a moment now to familiarize yourself with them.

There are **seven 0.7 mm holes** that need small rivets and **ten 1.6 mm** holes for the larger rivet. The larger rivets allow us to have a secure mechanical connection.
{% hint style="info" %}
For the following steps, start with the smaller rivets first and then work your way to the larger rivets. This limits the amount of flexing the board will do during striking and decrease the chance of broken traces.
{% endhint %}
#### 1. Insert the rivet
Using fine tweezers, carefully pinch the rivet and place it in the hole. Repeat this process for all the rivets.
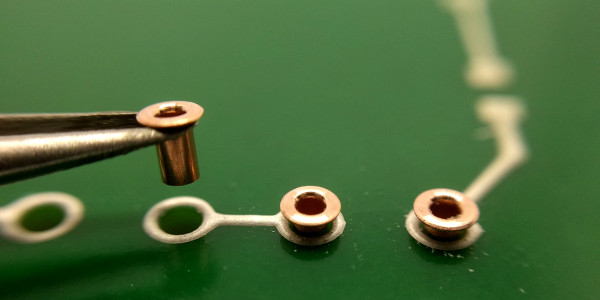
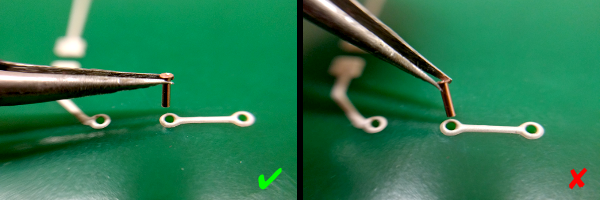
The small (0.4mm) rivets can be tricky to handle, we recommend placing the substrate flat on a table then pinching the rivets from their side. Pinching them from the head can send them shooting across the room.
#### 2. Flip the board
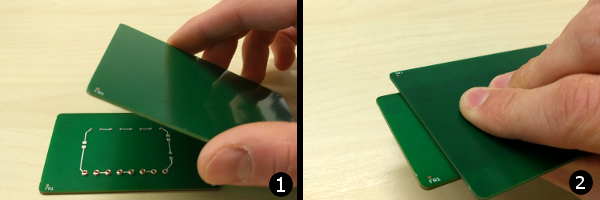
Place a flat plate on top of your PCB and flip the board upside down so that all the rivets are facing up. Ensure you are working on a **hard surface/table** that will not deflect.
{% hint style="warning" %}
**Be careful**: all of your rivets may fall out if the boards are not pressed together!
{% endhint %}
#### 3. Position the rivet tool
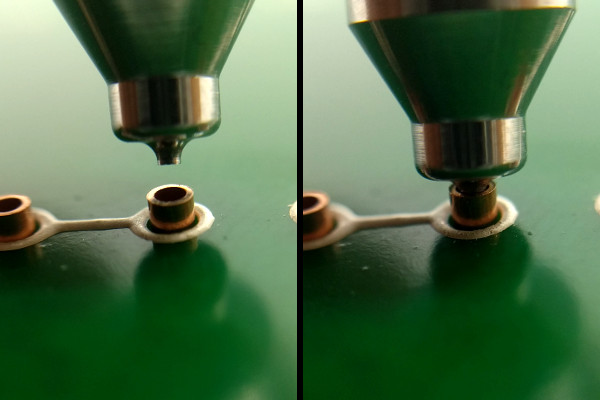
Position the rivet tool on top and ensure the tip of the tool is centered on the rivet. **Ensure the tool is centered** before pressing down. Otherwise the rivet may buckle inwards.
#### 4. Strike down.
Use a small mallet or similar tool to apply a downward force on the rivet tool. You do not need to apply large amounts of force, just enough to deform the copper. The rivet should not be 'loose' after striking, if the rivet is loose try striking it again a bit harder.
{% hint style="warning" %}
Applying too much force can damage the printed traces and the FR1 underneath.
{% endhint %}
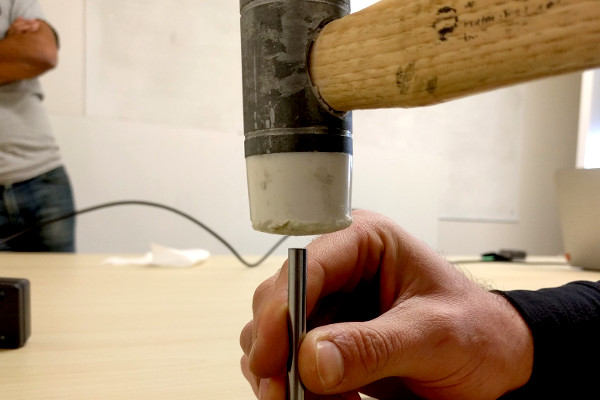
Repeat this step for all rivets so they are flat, secure, and making good contact with the traces.
### Double check connections
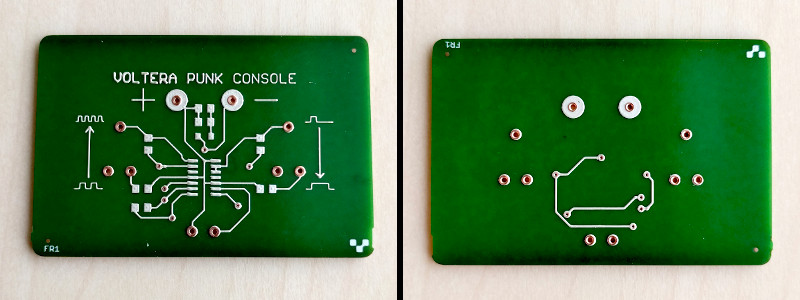
The rivet tools have been designed to flatten the rivets and prevent damage to the traces. If the rivets did not connect the top and bottom layer, then too little or too much force was used to deform them.
{% hint style="info" %}
**Tip**: 2 or 3 minutes with the multimeter, can save 20-30 minutes of debugging.
{% endhint %}
Spend a few minutes with a multimeter to ensure the connection has been made. If they haven't you can always touch them up with a bit of flux and solder wire.
---
# Agent Instructions
This documentation is published with GitBook. GitBook is the documentation platform designed so that both humans and AI agents can read, navigate, and reason over technical content effectively. Learn more at gitbook.com.
## Querying This Documentation
If you need additional information that is not directly available in this page, you can query the documentation by asking a question.
Perform an HTTP GET request on the following URL with the `ask` and `goal` query parameters:
```
GET https://docs.voltera.io/docs/v-one/learn-v-one/v-one-projects/punk-console-project/5.-adding-rivets.md?ask=&goal=
```
`ask` is the immediate question: it should be specific, self-contained, and written in natural language.
`goal` is what the user is ultimately trying to achieve, the reason they need the answer. Sharing it helps GitBook give you a better, more relevant answer. A goal is most helpful when it describes the outcome the user wants rather than restating the question. For example, with `ask=how do I create an API token`, a goal like `automate deployments from our CI pipeline` lets GitBook tailor the answer to that use case.
The response will contain a direct answer to the question and relevant excerpts and sources from the documentation.
Use this mechanism when the answer is not explicitly present in the current page, you need clarification or additional context, or you want to retrieve related documentation sections.
