Printer Setup
Unpacking your V-One
The V-One will arrive in a single box with all the included tools and accessories inside. The ink and paste will arrive in a separate padded envelope along with the box. If you also purchased the optional drill attachment, this will be included in the box as well.

Once you’ve opened the box, remove the Tools and Accessories box as well as the power cable box. Place them aside for now, and remove the V-One in its foam from the box. Avoid picking the V-One up by the bridge. Instead, use two hands and lift it from the base.


The pictures above represent the packaging including the optional V-One Drill Attachment add on.
The V-One comes with all the tools and accessories you need to get started:
Tools & Accessories
1 - Probe
2 - Dispensing Units
3 - Tip caps
1 - USB Cable
1 - Power Cable
4 - Thumbscrews
2 - Board Clamps
1 - Tweezers
1 - Voltera Disposable Nozzles - 25 Pack
Consumables
1 - Conductive Ink Cartridge
1 - Solder Paste Cartridge
1 - Solder Wire Spool
1 - Hello World Circuit Kit
10 - 2" x 3" FR1 Substrates
6 - 3" x 4" FR1 Substrates
The Conductive Ink and Solder Paste Cartridges will be shipped in a separate envelope.
Printer Anatomy
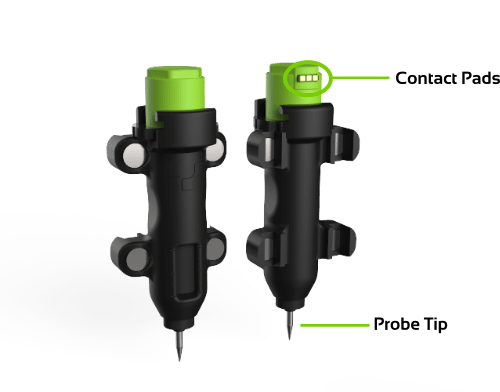
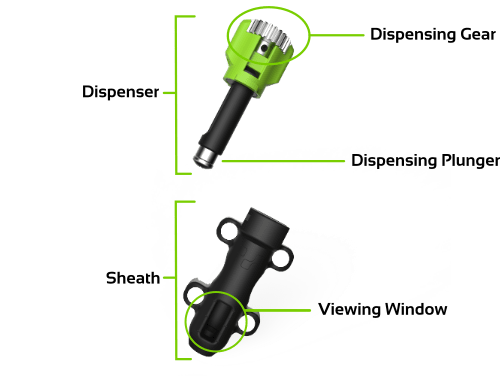
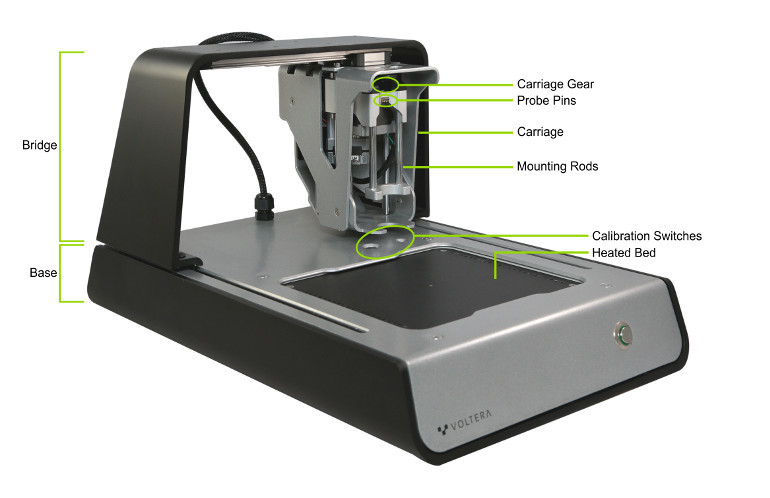
Take some time to get comfortable with the parts of the V-One. We will be working with them over the next couple of sections.
Probe:

Dispenser:

V-One:

Software Installation
Download the V-One software installer for your operating system. Open the file and install on your system.
Download the V-One SoftwareSetting Up Your V-One
Find a spot for your V-One.
A flat, level surface with minimum vibration is optimal.
A well ventilated area is recommended.
Do not place the V-One on a surface that is susceptible to heat damage.
Avoid exposure to extreme temperatures – room temperature is ideal.
Connect your V-One.
Connect the USB cable to the V-One, then to your computer.
Connect the power cable to the V-One, then to an outlet.
Open the Voltera V-One software.
The V-One may require a firmware update on startup. Do not disconnect or turn off the V-One during the firmware update!
Now you are ready to get printing!
Last updated
Was this helpful?