Y-Motor Replacement
Repair guides are to be used when directed by Voltera Support only!
Performing these without Voltera Support's direction could be the wrong resolution path for your issue and could cause damage to your machine. If you haven't been in contact with Voltera Support about your issue please email [email protected] or reach out in the chat before proceeding.
Before you begin
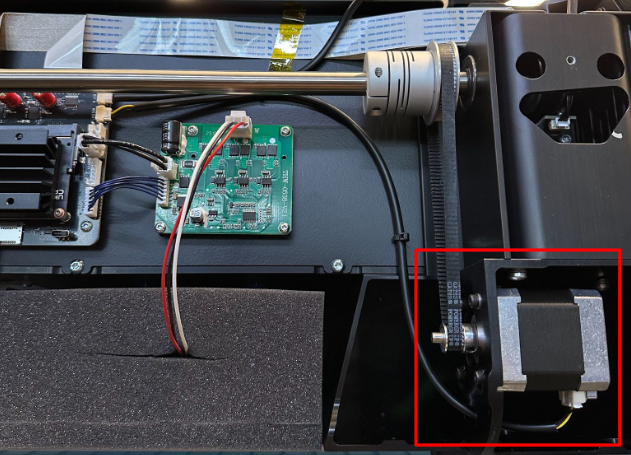
This guide will take you through replacing the Y-motor in NOVA. Before beginning this guide you should have been in contact with our support team and received replacement parts.
Safety first! Before starting any repair, take a moment to review the safety information in your user manual. An online version of the guidelines can also be found here.
As you work through this guide please reach out to our email [email protected] or through the chat if you run into any issues or have any questions. We are more than happy to assist you virtually with this repair.
When in doubt, reach out!
Estimated Repair Time:
60 minutes
Tools you will need:
T20 Torx bit + screwdriver
2.5 mm and 4 mm hex keys
Parts & Fixtures you have received from Voltera:
Y-motor
Extra mounting screws and washers (if needed)
Dial gauge and mounting fixture
Belt tensioner
Replace the Y-Motor
Insert the new Y-motor
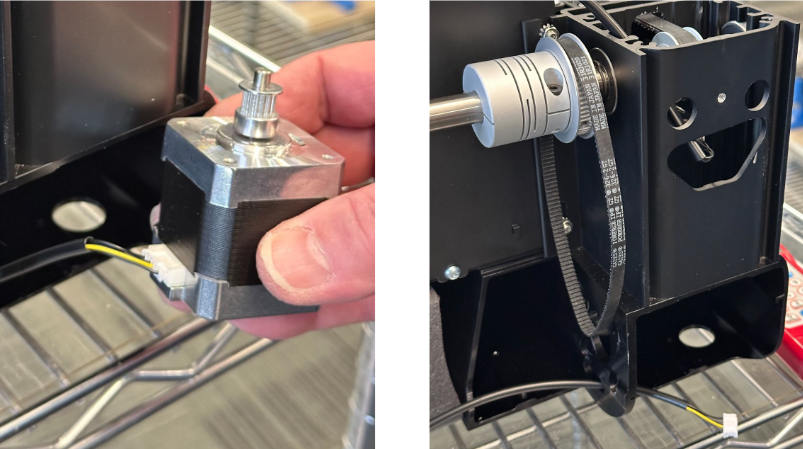
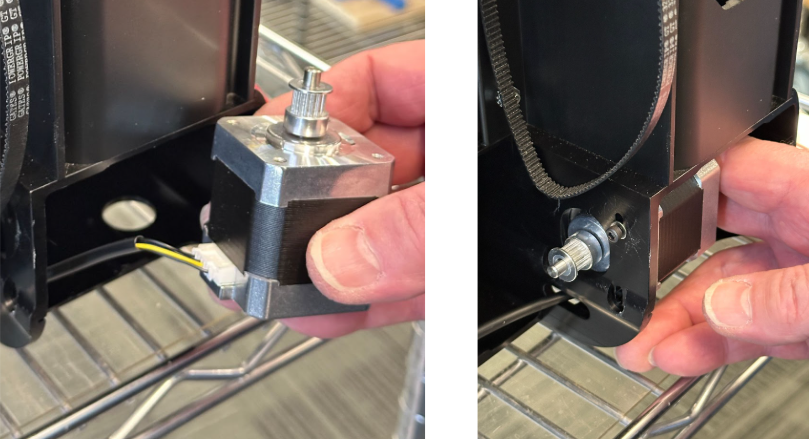
Take the new Y-motor and plug in the cable. Insert the motor into the mounting bracket.
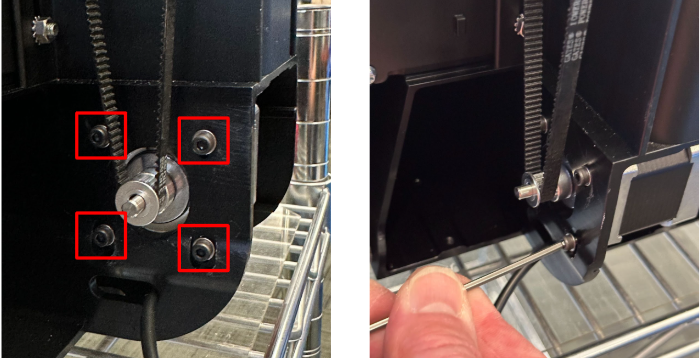
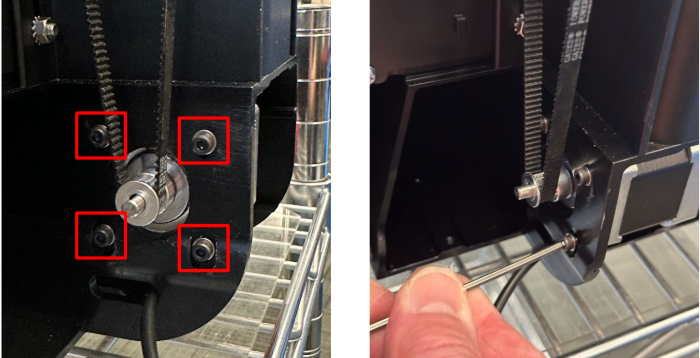
Using the 2.5mm hex key, loosely secure the motor in place with the 4 screws and washers.
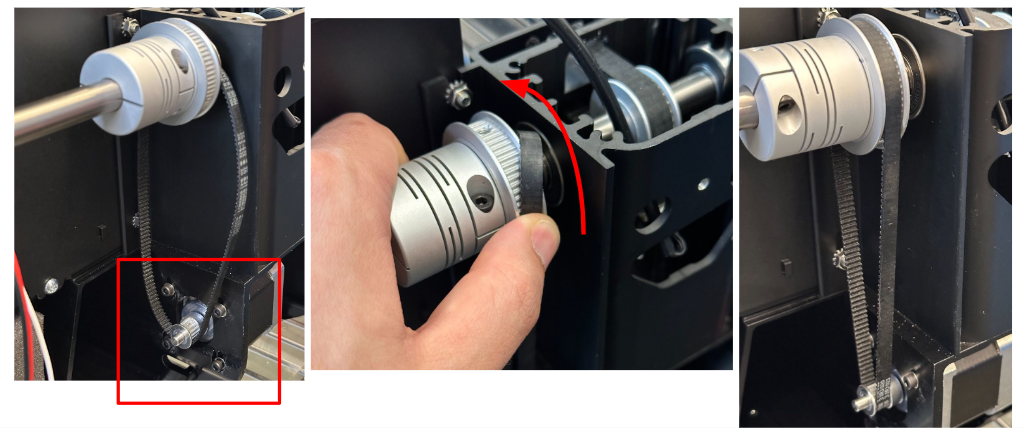
Place the belt over the y-motor pulley and ensure that the teeth of the belt are fully engaged with pulley. Now roll the belt over the larger pulley to fully seat the belt.

Tension the Y belt
Install the belt tensioner by positioning it between the upper and lower pulleys, then secure it by turning the screw clockwise.

Using your phone and an online chromatic tuner, pluck the Y belt like a guitar string. The measured frequency should be between 274–293 Hz.
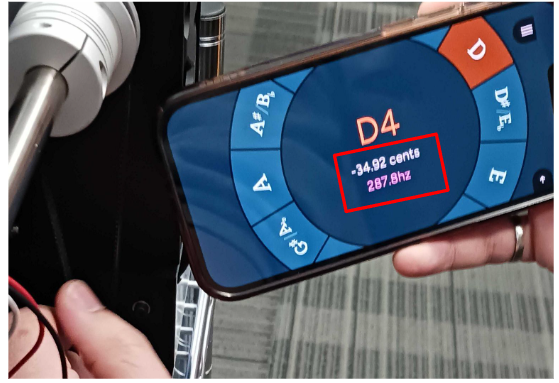
Turn the belt tensioner screw to increase or decrease the tension until the belt falls within the correct frequency range. Once the correct tension is achieved, tighten all four mounting screws. Then, loosen the belt tensioning tool and double-check the tension with your phone to confirm it remains within 274–293 Hz.

Using a second hex key push down on the top of the motor body to apply tension to the belt and tighten two of the four screws.
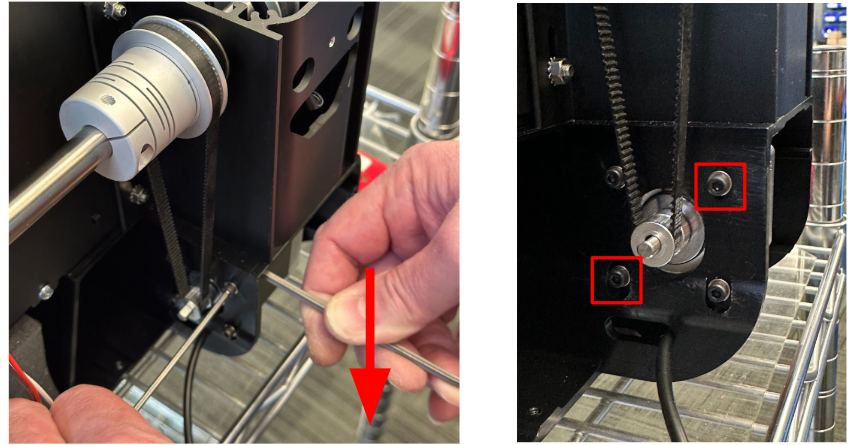
Using your phone and an online chromatic tuner, pluck the Y belt like a guitar string. The measured frequency should be between 274–293 Hz.

Apply downward force on the top of the motor to increase the tension until the belt falls within the correct frequency range. Once the correct tension is achieved, tighten all four mounting screws. Then, loosen the belt tensioning tool and double-check the tension with your phone to confirm it remains within 274–293 Hz.

Calibrate the Y-motor
Now that we have replaced the Y-motor we need to recalibrate NOVAs Y axis. To do this we will be using a dial gauge to measure NOVAs step size movement in the Y axis.
Install the Calibration Fixture
Attach the T shaped mounting fixture to the mounting grid at the below location, four mounting holes from the front. Use a 4mm hex key to tighten down the two bolts and secure the fixture.
It is critical that the jig is in the exact position as it could result in a machine crash otherwise
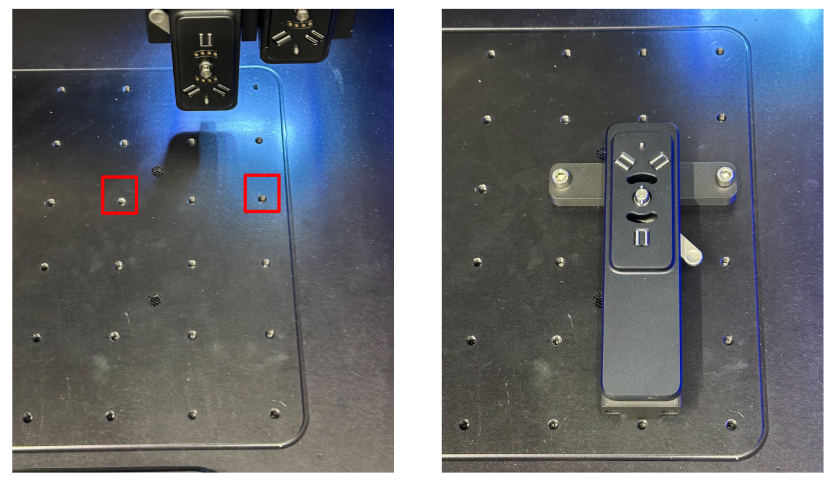
Attach the dial gauge to the T fixture by engaging the tool port lever. Now turn on the dial gauge by pressing the green on/off button and zero the dial gauge by pressing and holding the origin button.
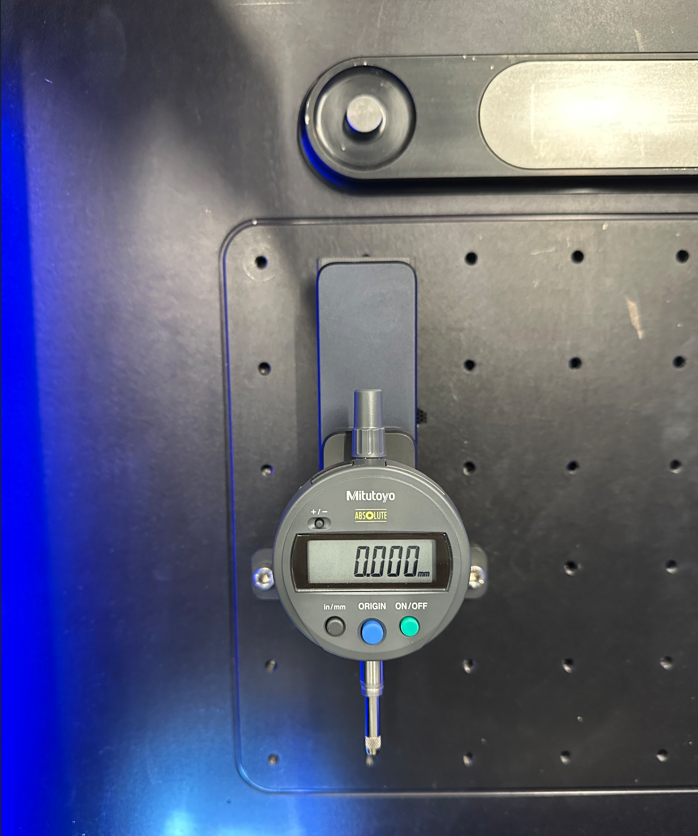
Run the Calibration Command
Open the console by clicking the ~ key and copy the below command block into the console. The command moves the tool mount forward and backwards in 1 mm increments; the goal is to find the difference between each shift and the absolute value is the compensation value.
As NOVA moves back and forth take note of the values on the dial gauge focusing on the decimals. It can be helpful to take a video of the dial gauge to review the measurements after the test or have a second person reading out the numbers as it goes.

Again, we are calculating the difference between each shift and the absolute value will be our compensation value.
Ex. The machine moves to 4.442 than 5.432. The compensation value would be 0.010 mm.
Once you have calculated the compensation value you can enter it in the console with the command below replacing the 'X' with your unique value.
A compensation of 0.015 mm will look like the image below when entered into the console:

Confirm Calibration Value
You can confirm that your compensation value is correct by entering this command block into the console and taking note of the difference between each 1 mm shift.
Any step movement difference under 0.020 mm is acceptable for this axis.

Repeat steps 2 and 3 until the calibration value is acceptable.
Repair Complete!
Congratulations, you have successfully replaced NOVAs Y-motor!
Please reach back out to our support team through email ([email protected]) or the chat to let them know everything went well. We will arrange a shipping label to return the old parts and calibration jig back to us for further testing.
Last updated
Was this helpful?
