Control Board Replacement
Repair guides are to be used when directed by Voltera Support only!
Performing these without Voltera Support's direction could be the wrong resolution path for your issue and could cause damage to your machine. If you haven't been in contact with Voltera Support about your issue please email [email protected] or reach out in the chat before proceeding.
Before you begin
This guide will take you through replacing the control board in NOVA. Before beginning this guide you should have been in contact with our support team and received replacement parts.
Safety first! Before starting any repair, take a moment to review the safety information in your user manual. An online version of the guidelines can also be found here.
As you work through this guide please reach out to our email [email protected] or through the chat if you run into any issues or have any questions. We are more than happy to assist you virtually with this repair.
When in doubt, reach out!
Estimated Repair Time:
40 minutes
Tools you will need:
Screwdriver
T6 Torx
T10 Torx
T20 Torx
1 small 4" zip tie
Parts you have received from Voltera:
Control board PCB
Save your calibration presets
Some of our machine calibration presets are stored onboard the control board. If we replace the control board we will need to manually write the calibration presets to the new control board.
Replace the control board
Remove the control board
Carefully detach all of the cables from the main control board.
In case you've forgotten, here is a video of how to properly disconnect a ribbon cable:
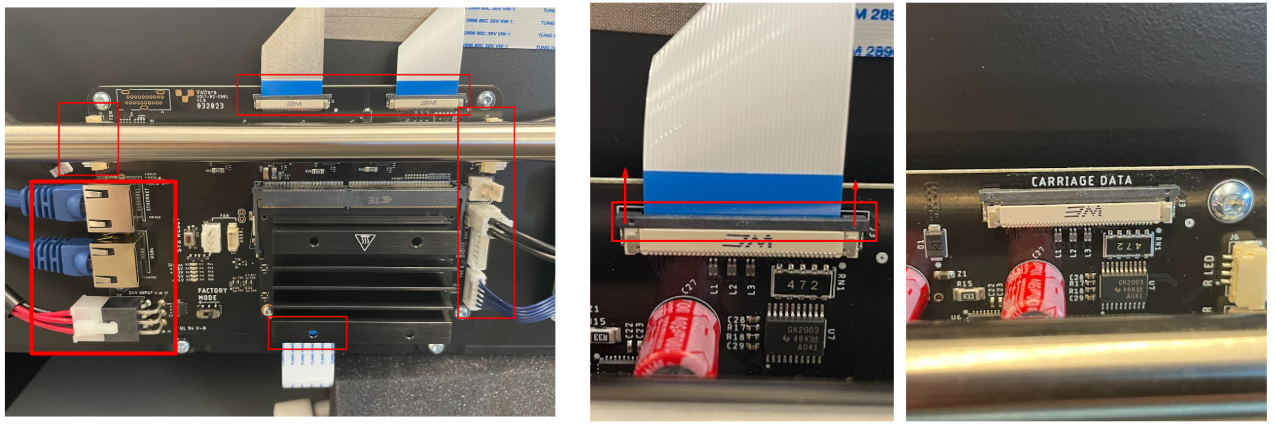
Unscrew the 4 screws holding the control board in place with a T10 torx and remove the board.

Swap the compute module (Optional)
If the new control board you received does not have a compute module mounted to it we will need to swap it from the current control board.
If your new control board has a compute module installed you can skip this step!
With the control board off, you can remove the two screws holding the compute module in place, with a T6 Torx.
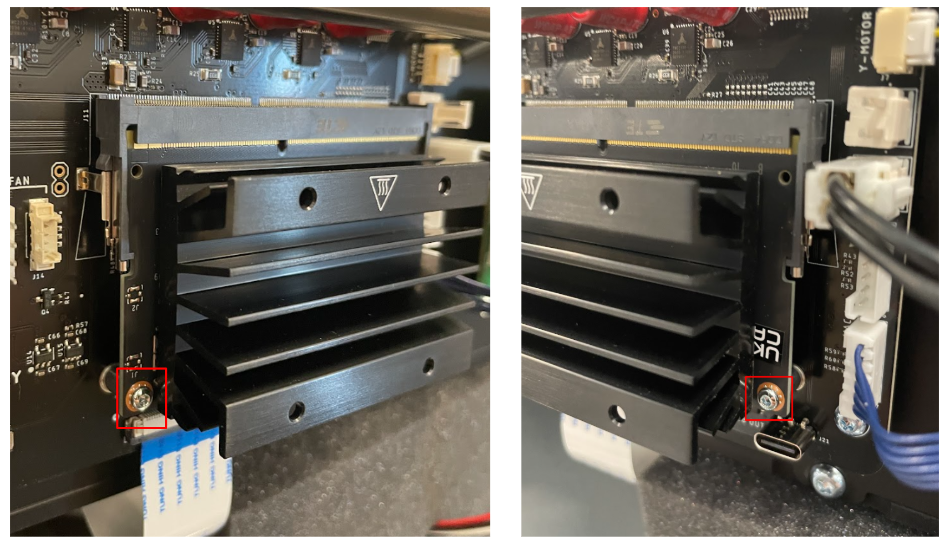
Release the two locking tabs on the module and it will swing up towards you about 10°. It can now be removed by sliding it down and out.

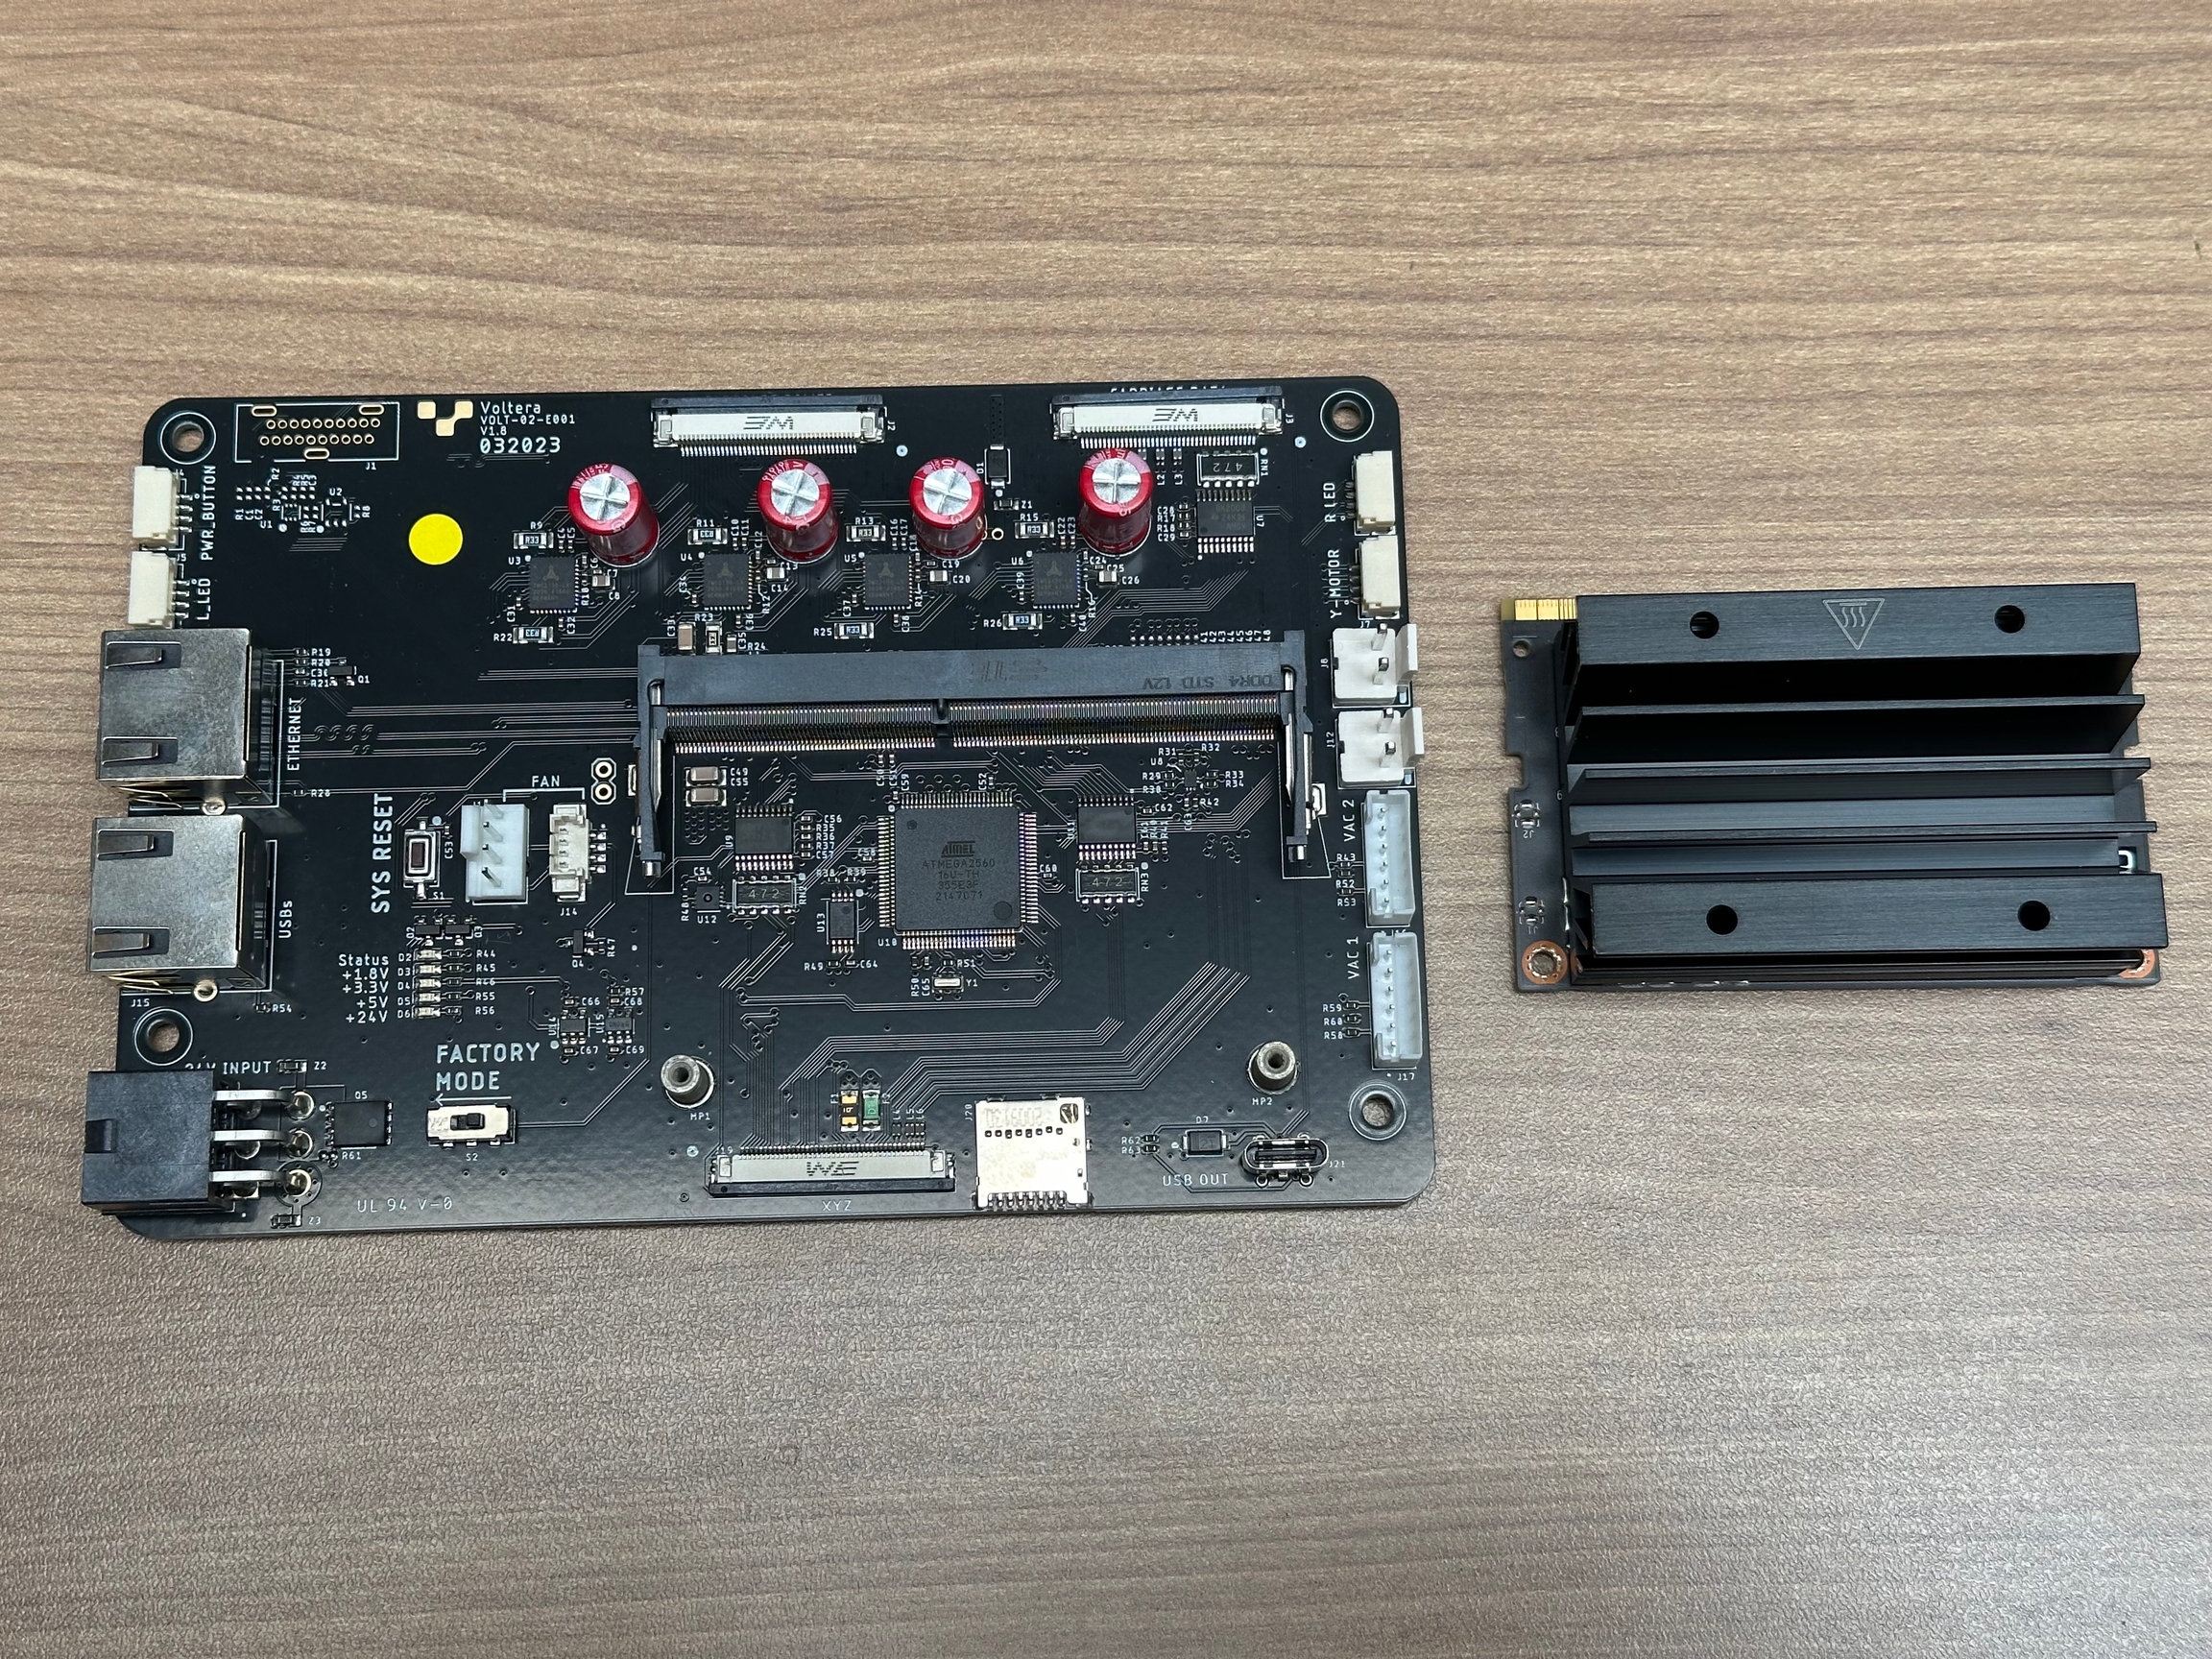
Install the compute module onto the new control board by reversing the previous steps. Slide the compute module into the slot on the control board at a 10° angle and push down to engage the two locking tabs.

Secure the compute module in place with the two screws and a T6 Torx.
Install the new control board
Mount the new control board onto NOVA with the four screws using a T10 Torx.

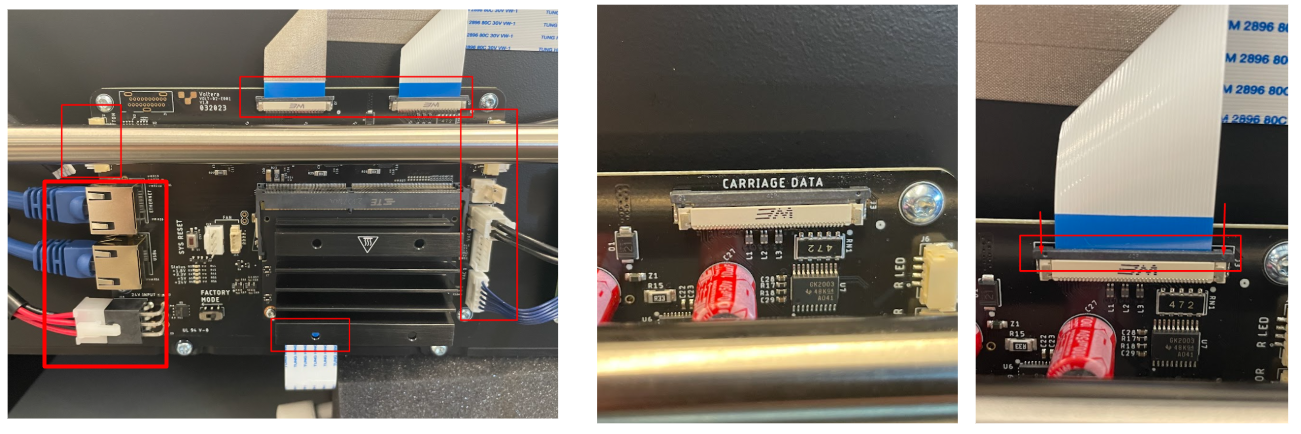
Plug in the cables for the power button, leds, motors, vacuum board, ribbon cables and port board. Again being gentle with the ribbon cables when plugging them back in.
The blue tape should be level with the connector. You shouldn’t feel any resistance when they go in. Once in, close the black locking tab.
Set your calibration presets
Save the calibration values
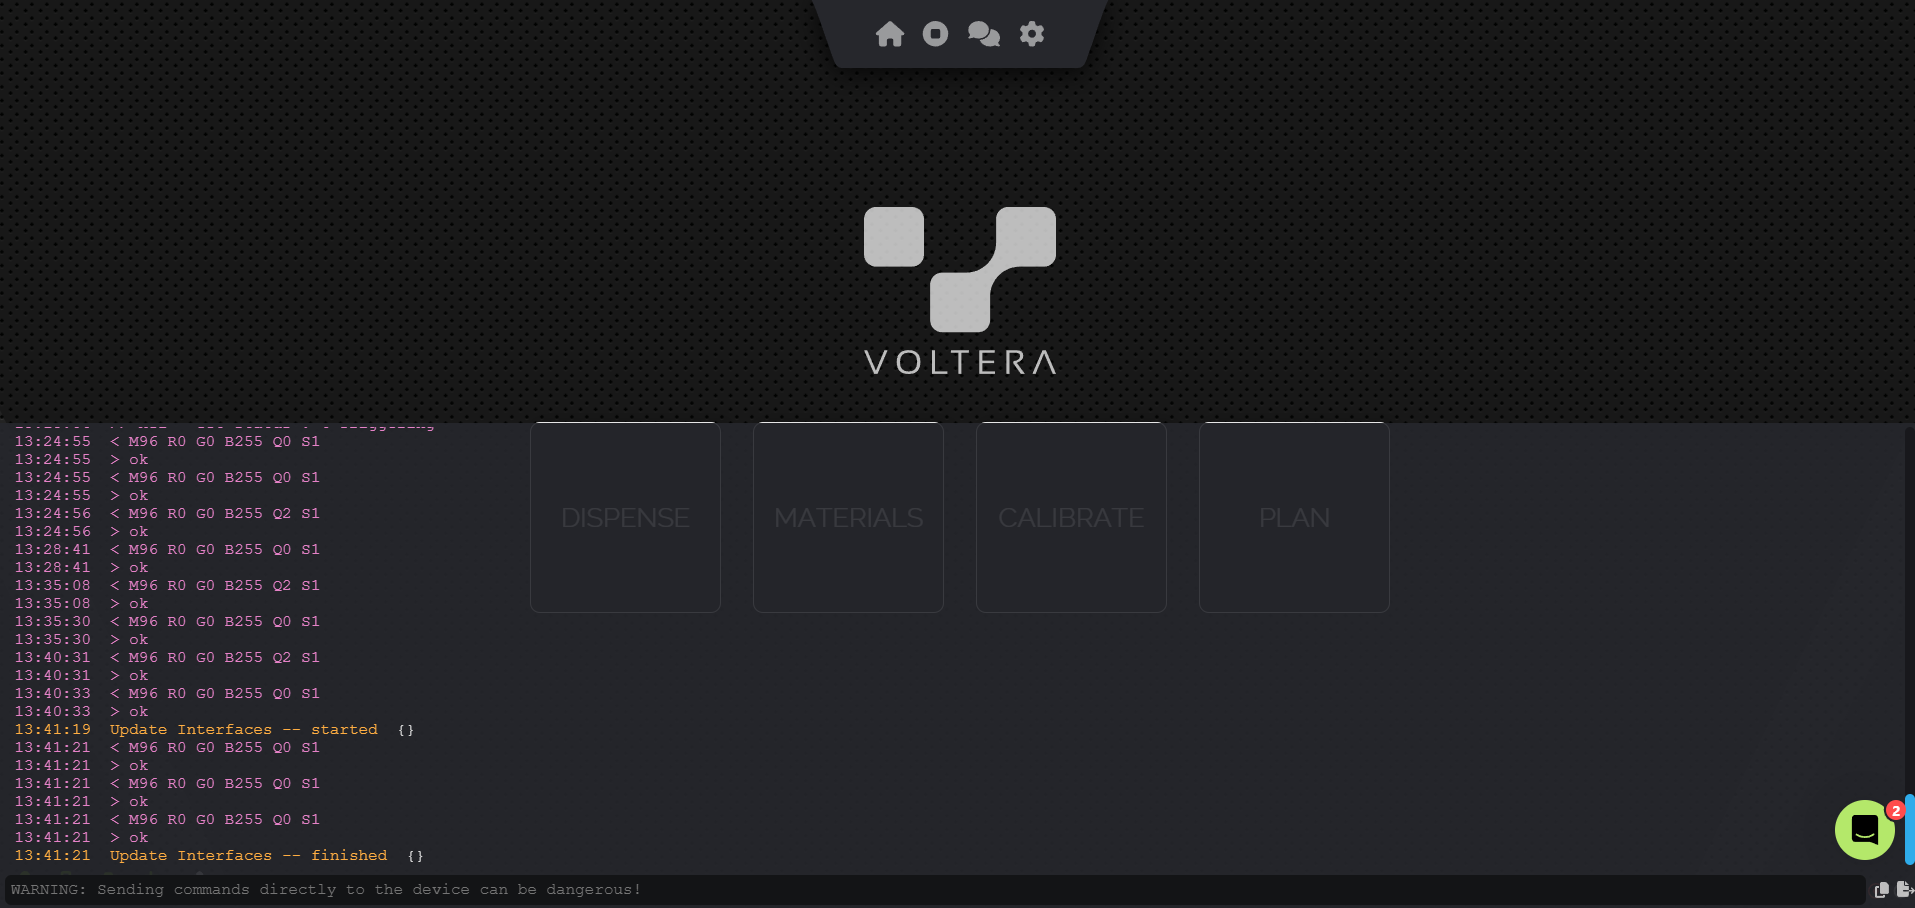
Type the command M520 into the console to output the current calibration values. Take a screenshot of the command line output and send it to our support team by email ([email protected]) or chat along with the screenshot of your previous calibration values.
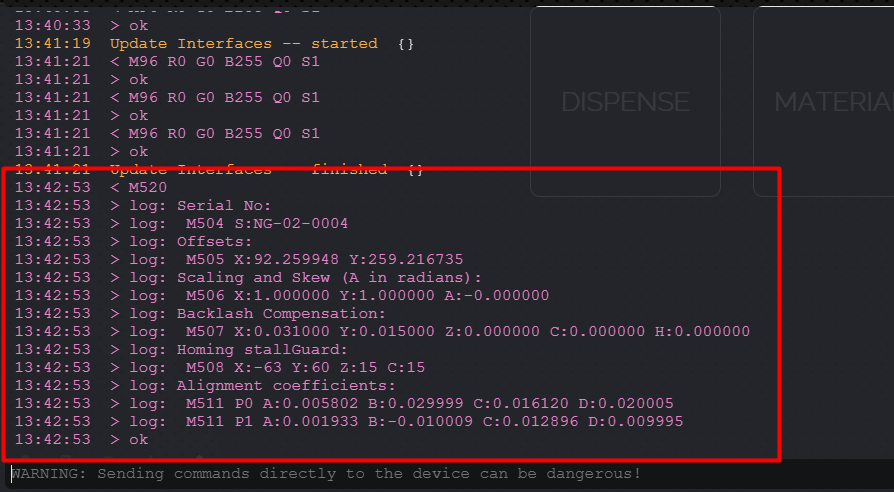
Our support team will now give you a list of commands to copy and paste into the console that will save your previous calibration values to the new control board.
Repair Complete!
Congratulations, you have successfully replaced NOVAs control board!
Please reach back out to our support team through email ([email protected]) or the chat to let them know everything went well. We will arrange a shipping label to return the old parts back to us for further testing.
Last updated
Was this helpful?
